#1 - Get to know your camera. Read the boring manual. I have a Pentax Optio S60 - Point and Shoot. I can't change too many settings, BUT I did learn about changing the White Balance. Very important to set it to the correct lighting.
#2 - Lighting - Miss B over BlahBlahBlag found some great lights here, but they were out of my budget, so I found these. You can get them here. $15 each. I put 2 in lamps with clamps (from my garage, but you can buy them at a hardware store) and 1 in a desk lamp from IKEA
Heres what my "photo studio" looks like. Swanky, no?
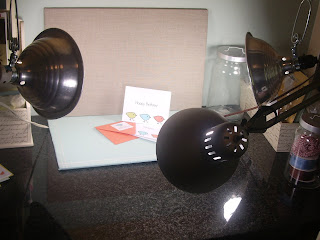
I clamped the lamps onto some overhead cabinets. Sometimes I use a light tent, but I'm finding with these bulbs, I don't need need it. Got bigger stuff to shoot like aprons or ironing board covers? Take a look at this article.
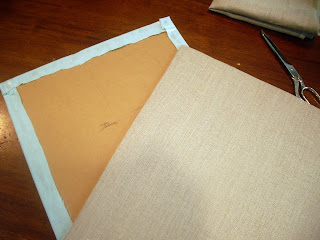
I also wrapped two pieces of scrap cardboard; one in tan linen fabric (left over from the bottom of my bedroom drapes from IKEA) and one in robin's egg blue kitchen towel (from Target - Easter clearance - $1.25). I secured the fabric by hot glueing it in the back. These are backdrops.
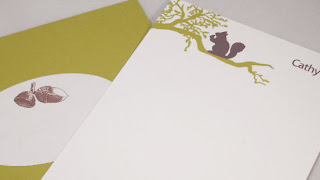
Here's an un-retouched photo with the bulbs and the correct camera settings and my new backdrops.
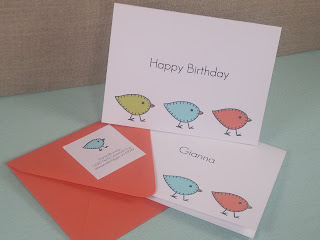
It's a big improvement over what I've done in the past. I still need to get LOTS better at staging the photo. I'm on the search for props and such.
#3 - Retouching - If the correct camera setting and lights still don't deliver what you want, there's Photoshop. There is this very helpful article from The Switchboards.com. I learned a lot from the article, but I was still having trouble getting my whites white without messing up my other colors. Well, last week, my son's friend showed me how to fix that. With your photo open in Photoshop click on the "Image" menu, go down to "Adjustments" and select "Selective Color". You can then play with each color independently of all the other colors.
Here is the original photo...
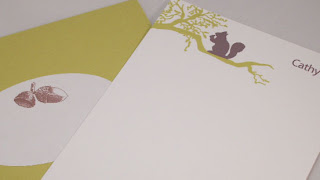
Here's the same photo after using the Selective Color controls in Photoshop. No, it's not the best photo in the world, but it is more accurate of what the product looks like.
I hope this information helps someone. I've so appreciated others who have given tips. There is Pioneer Woman's blog which is incredibly generous and knowledgeable.
Now if I could just figure out why all my photos are a tad hazy!


3 comments:
Thanks for these tips, I'll bookmark it. I don't have a great camera myself so I've learned to stay near a window or go outside. I've also learned how to use the manual setting on my camera to increase the amount of light coming into the lens (and getting good at being really really still)!
For your haze, try playing with LEVELS and separately, the BRIGHTNESS and CONTRAST. I've had Photoshop Lightroom for about a year now and I love it. I have a preset now for each room of the house and even the time of day because the light coming into the house changes. Then it's just a couple of clicks to get the same settings as before, including all color and light changes.
Also, while you're playing with white balance... Try printing out a sheet of paper with tinted blocks on it: ivory, pale blue, and any other off-white shades. Then when you set your white balance, use these "color blocks". I sometimes use a pale blue to get a warmer tone in the picture. Whatever tint you set your white balance to, the picture will have the opposite color tone to it. I once did it with a photo of the moon using an orange paint chip card to get a rich blue moon straight out of the camera without photoshop. Have fun with it!
thanks for the tips! i'm always looking for better ways to photograph my cards for MY blog, too! i'll have to try some of these. [btw, i think your photos always look good!]
Natalie, Thanks for the Brightness tip! It has come in handy already. Much appreciated!
Whitney
Post a Comment